Email Notifications
Send a custom email to one or more recipients the moment someone submits a response. Use it to alert your team about a new lead, ping a customer-success owner when NPS drops, or send a thank-you note that quotes the respondent's own answers back to them.
Want a recurring digest instead of an email per response? See Email Reports. Want to POST the response to your own stack? See Webhooks.
How it fits in a workflow
A workflow is a trigger + an action. Email Notifications uses the On Submission trigger family.
Choose an On Submission trigger
In the Set Trigger panel, under ON SUBMISSION, pick one:
- Any full response — every completed response sends an email.
- Any full response with conditions — only responses matching your conditions send an email. Add one or more conditions (e.g. Rating is less than 3, Country equals India) and combine them with
and/or.
Note: Email Notifications is only available for On Submission triggers. If you select an On Schedule trigger (Daily / Weekly / Monthly), the only available action is Email Reports.
Set up an Email Notification
1. Open the Messages panel
Open your survey and click the Workflow tab. On the right, find the Messages card and click + Add. A full-screen Messages window opens.
2. Add a trigger
Click + next to Triggers to create a new trigger. In the Set Trigger panel, pick an On Submission option (see above), then click Save Logic.
3. Add the Email Notification action
Click + Add action. For On Submission triggers, you'll see two options — Receive email notifications and Deliver a webhook.
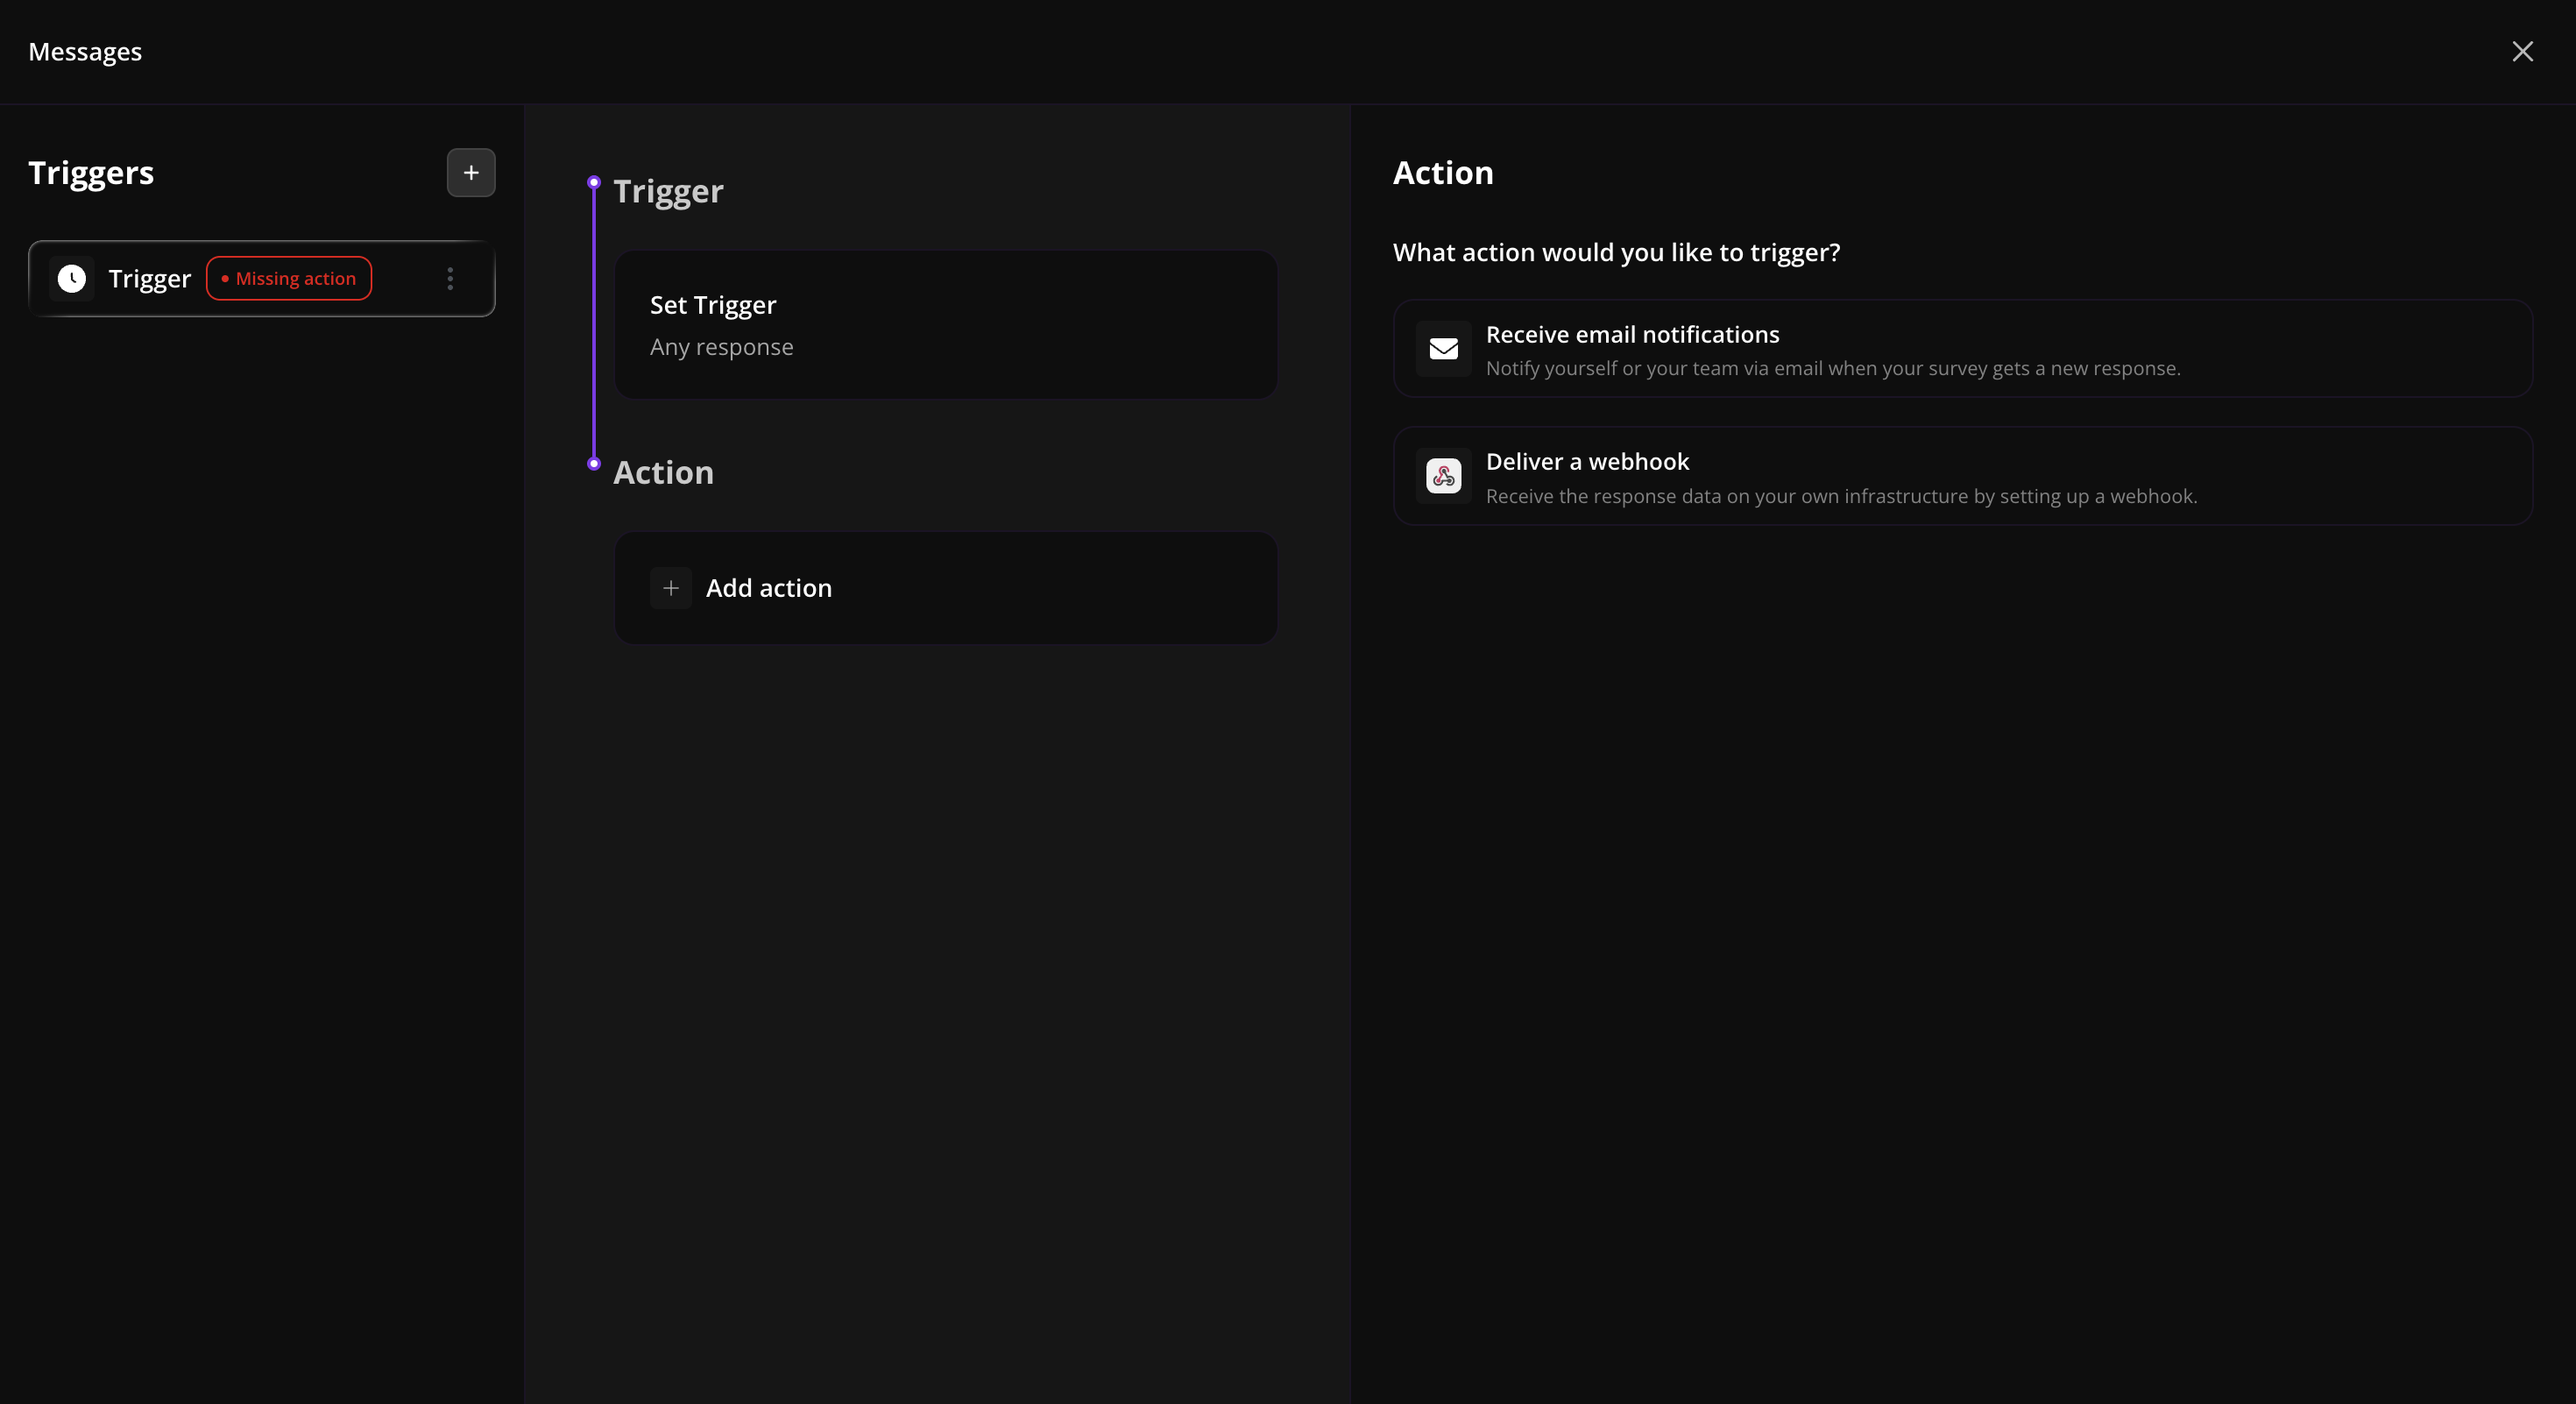
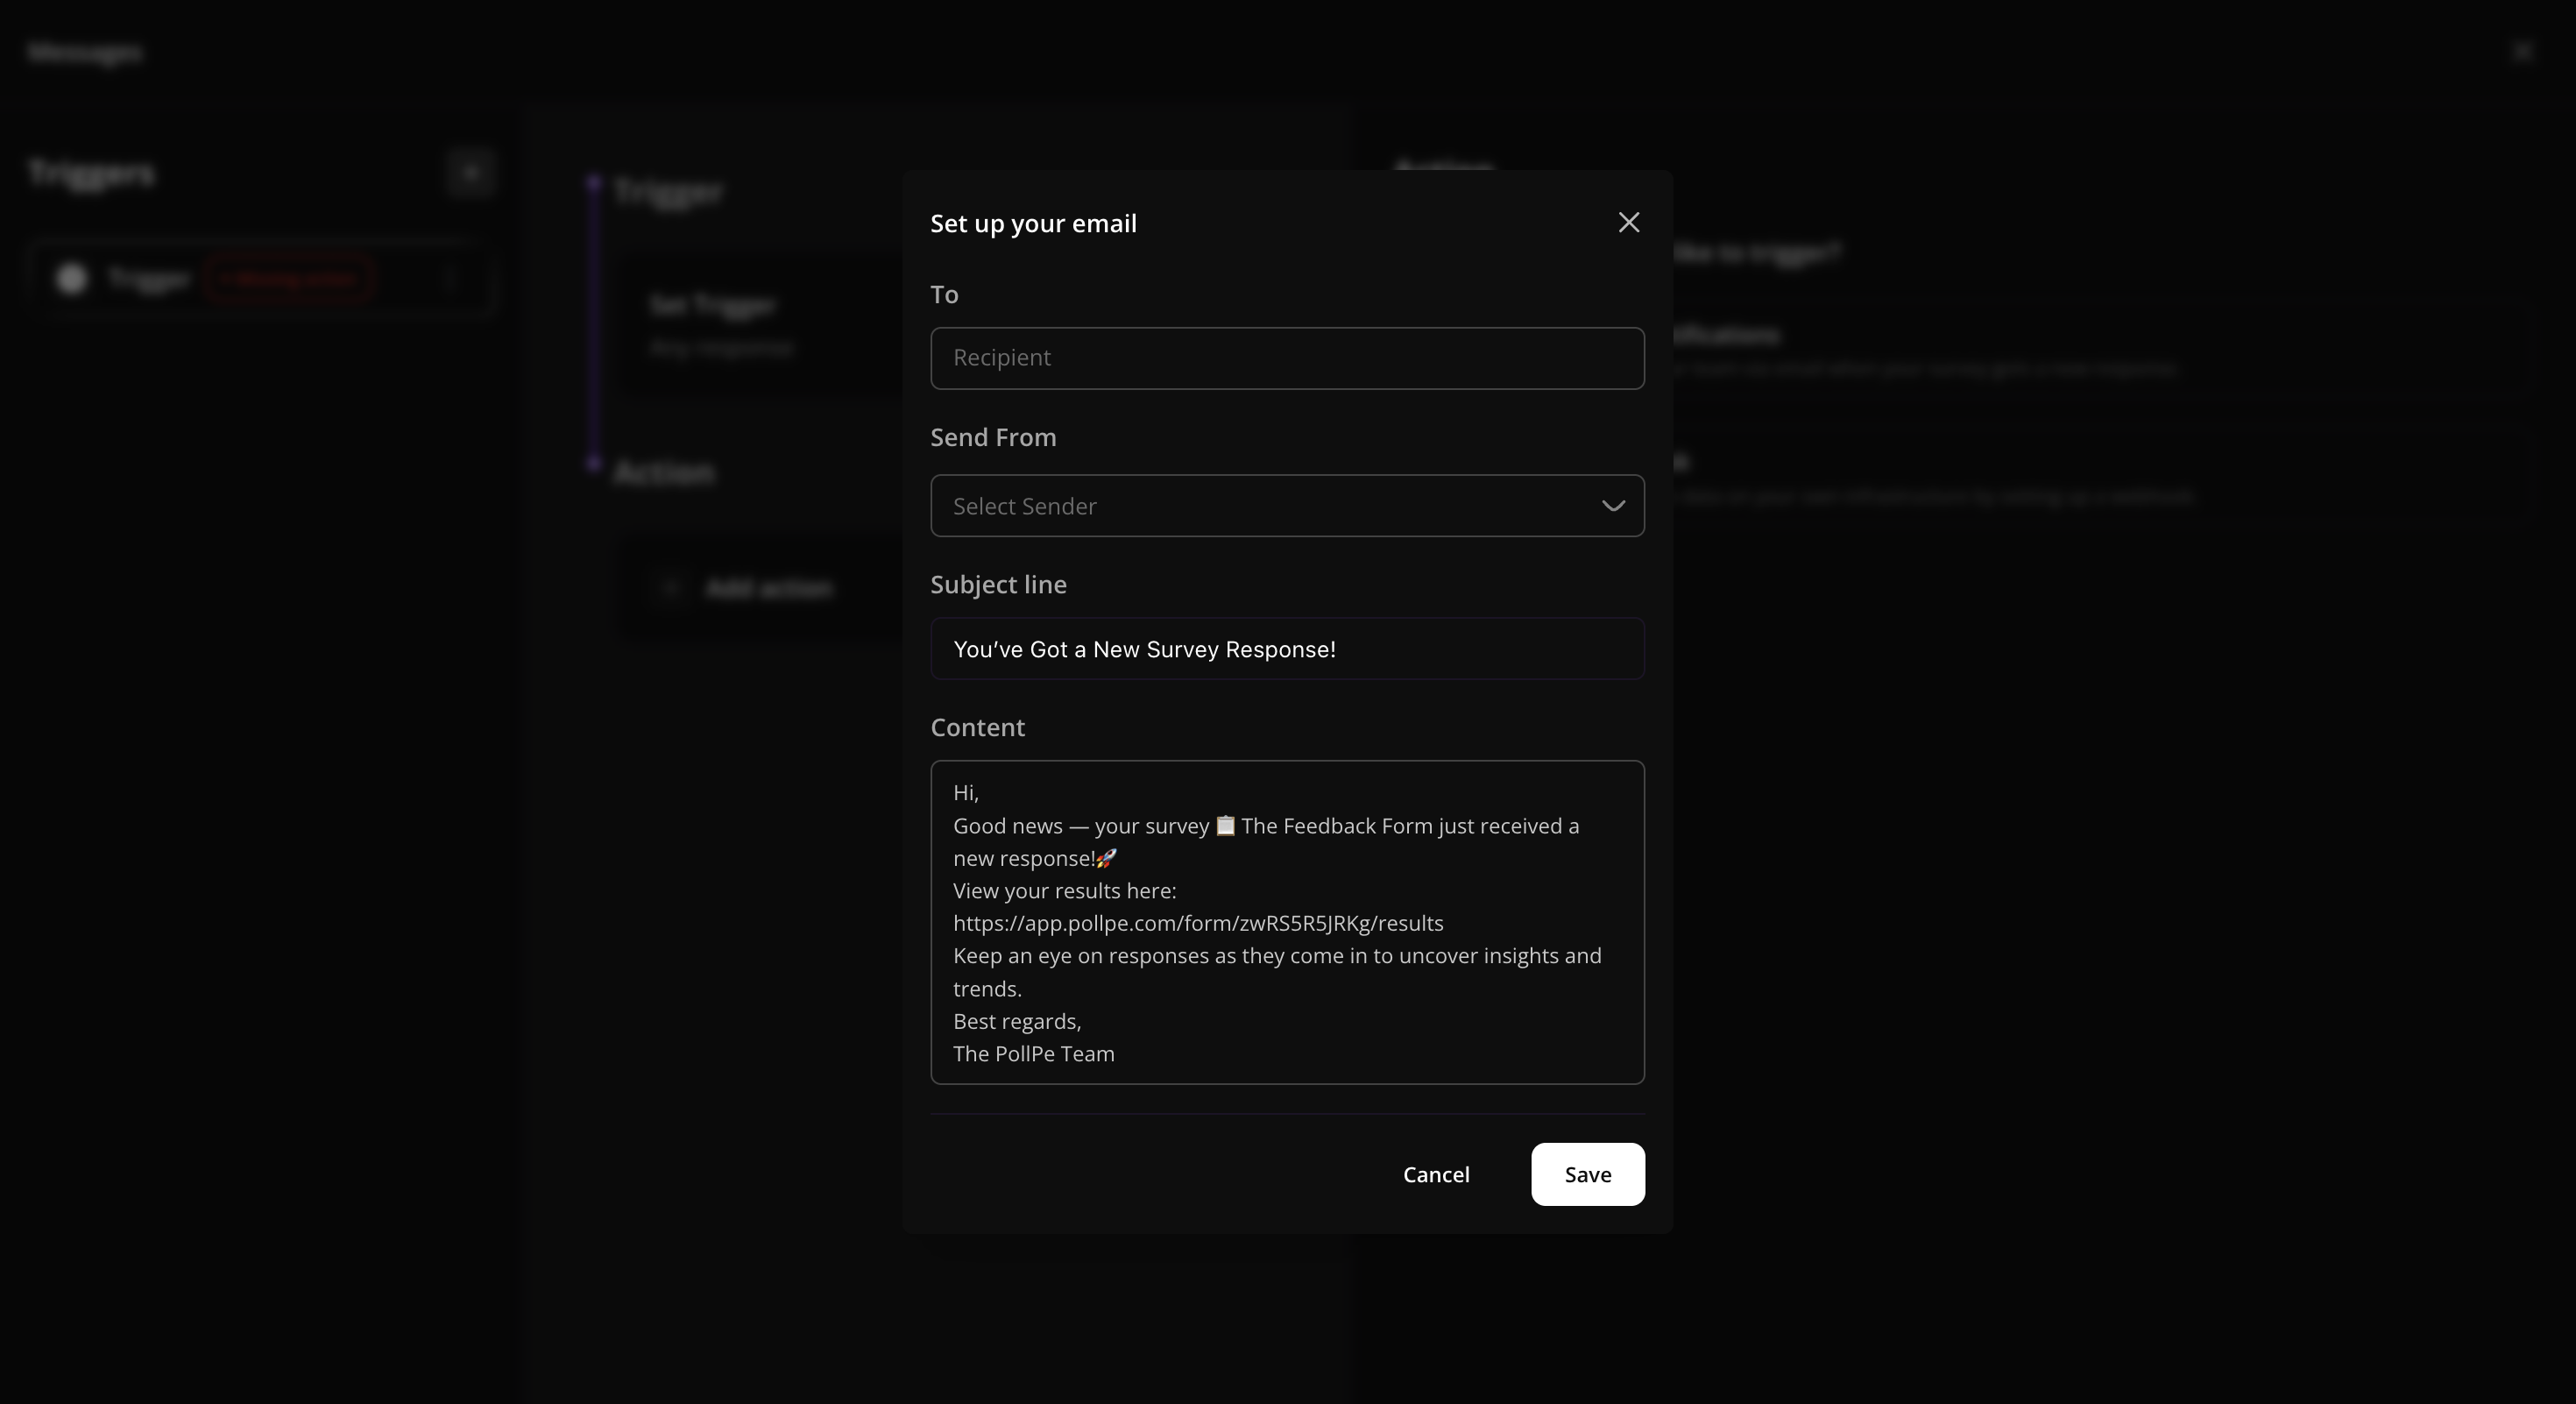
Pick Receive email notifications. A Set up your email dialog opens with four fields:
| Field | What it does |
|---|---|
| To | One or more recipient email addresses. Press Enter after each address to add it as a tag. |
| From | The sender identity. Defaults to PollPe Notify <[email protected]>. You can pick a custom SMTP sender if you've configured one for your workspace. |
| Subject Line | The email subject. |
| Content | The email body, edited in a rich-text editor with bold, italic, underline, alignment, and dynamic variables. |
4. Personalize with dynamic variables
Type @ anywhere in the Subject or Content to insert a variable. PollPe shows a picker with:
- Every question in your survey — the respondent's answer fills in at send time.
- Hidden parameters — any URL hidden fields you've configured for this survey.
Inserted variables appear as styled badges in the editor and are replaced with the actual response value when the email is sent. For example, a subject like:
New response from @Question 1 — score @Question 4
…will render as:
New response from [email protected] — score 9
5. Save and activate
Click Save on the dialog, then Save Logic on the workflow. The trigger card shows an Active badge once both a trigger and an action are set. New responses now trigger the email immediately — there is no manual step.
Manage your notification
From the Messages window, click the saved email action to:
- Edit — change recipients, subject, content, or sender.
- Delete — remove the action. The trigger stays, but won't send emails until you add an action again.
You can also rename or delete the whole trigger from the Triggers list on the left.
Tips & limits
- One email action per workflow. A single workflow sends one notification email per matching response. For different emails to different people, create separate triggers with their own conditions.
- Multiple recipients are fine. A single email can go to as many addresses as you want — add them all as tags in the To field.
- Combine with a webhook. Email Notifications and Deliver a Webhook can both sit on the same On Submission trigger, so you can alert humans and your stack from one workflow.
- Use conditions to keep noise down. Routing every response to your inbox gets old fast. Use Any full response with conditions to alert only on the ones that matter (low NPS, high-intent leads, specific answer choices).
- Variables work in the subject line too. A subject with the respondent's name or score makes the email scannable in a crowded inbox.
- Sender deliverability: the default
[email protected]is authenticated and lands in inboxes reliably. If you send from your own SMTP, make sure SPF/DKIM is set up.
Common use cases
- New-lead alerts — your sales team gets pinged the second a high-intent response comes in.
- Negative feedback escalation — CX gets an email only when CSAT or NPS drops below a threshold.
- Internal hand-off — route responses to a specific owner based on a "Which team do you need?" question.
- Personalized acknowledgement — send a thank-you email that quotes the respondent's actual answers back to them (using an Email question + dynamic variables).