Adding Contacts Manually
Manually adding contacts allows you to quickly build your audience by entering information one at a time.
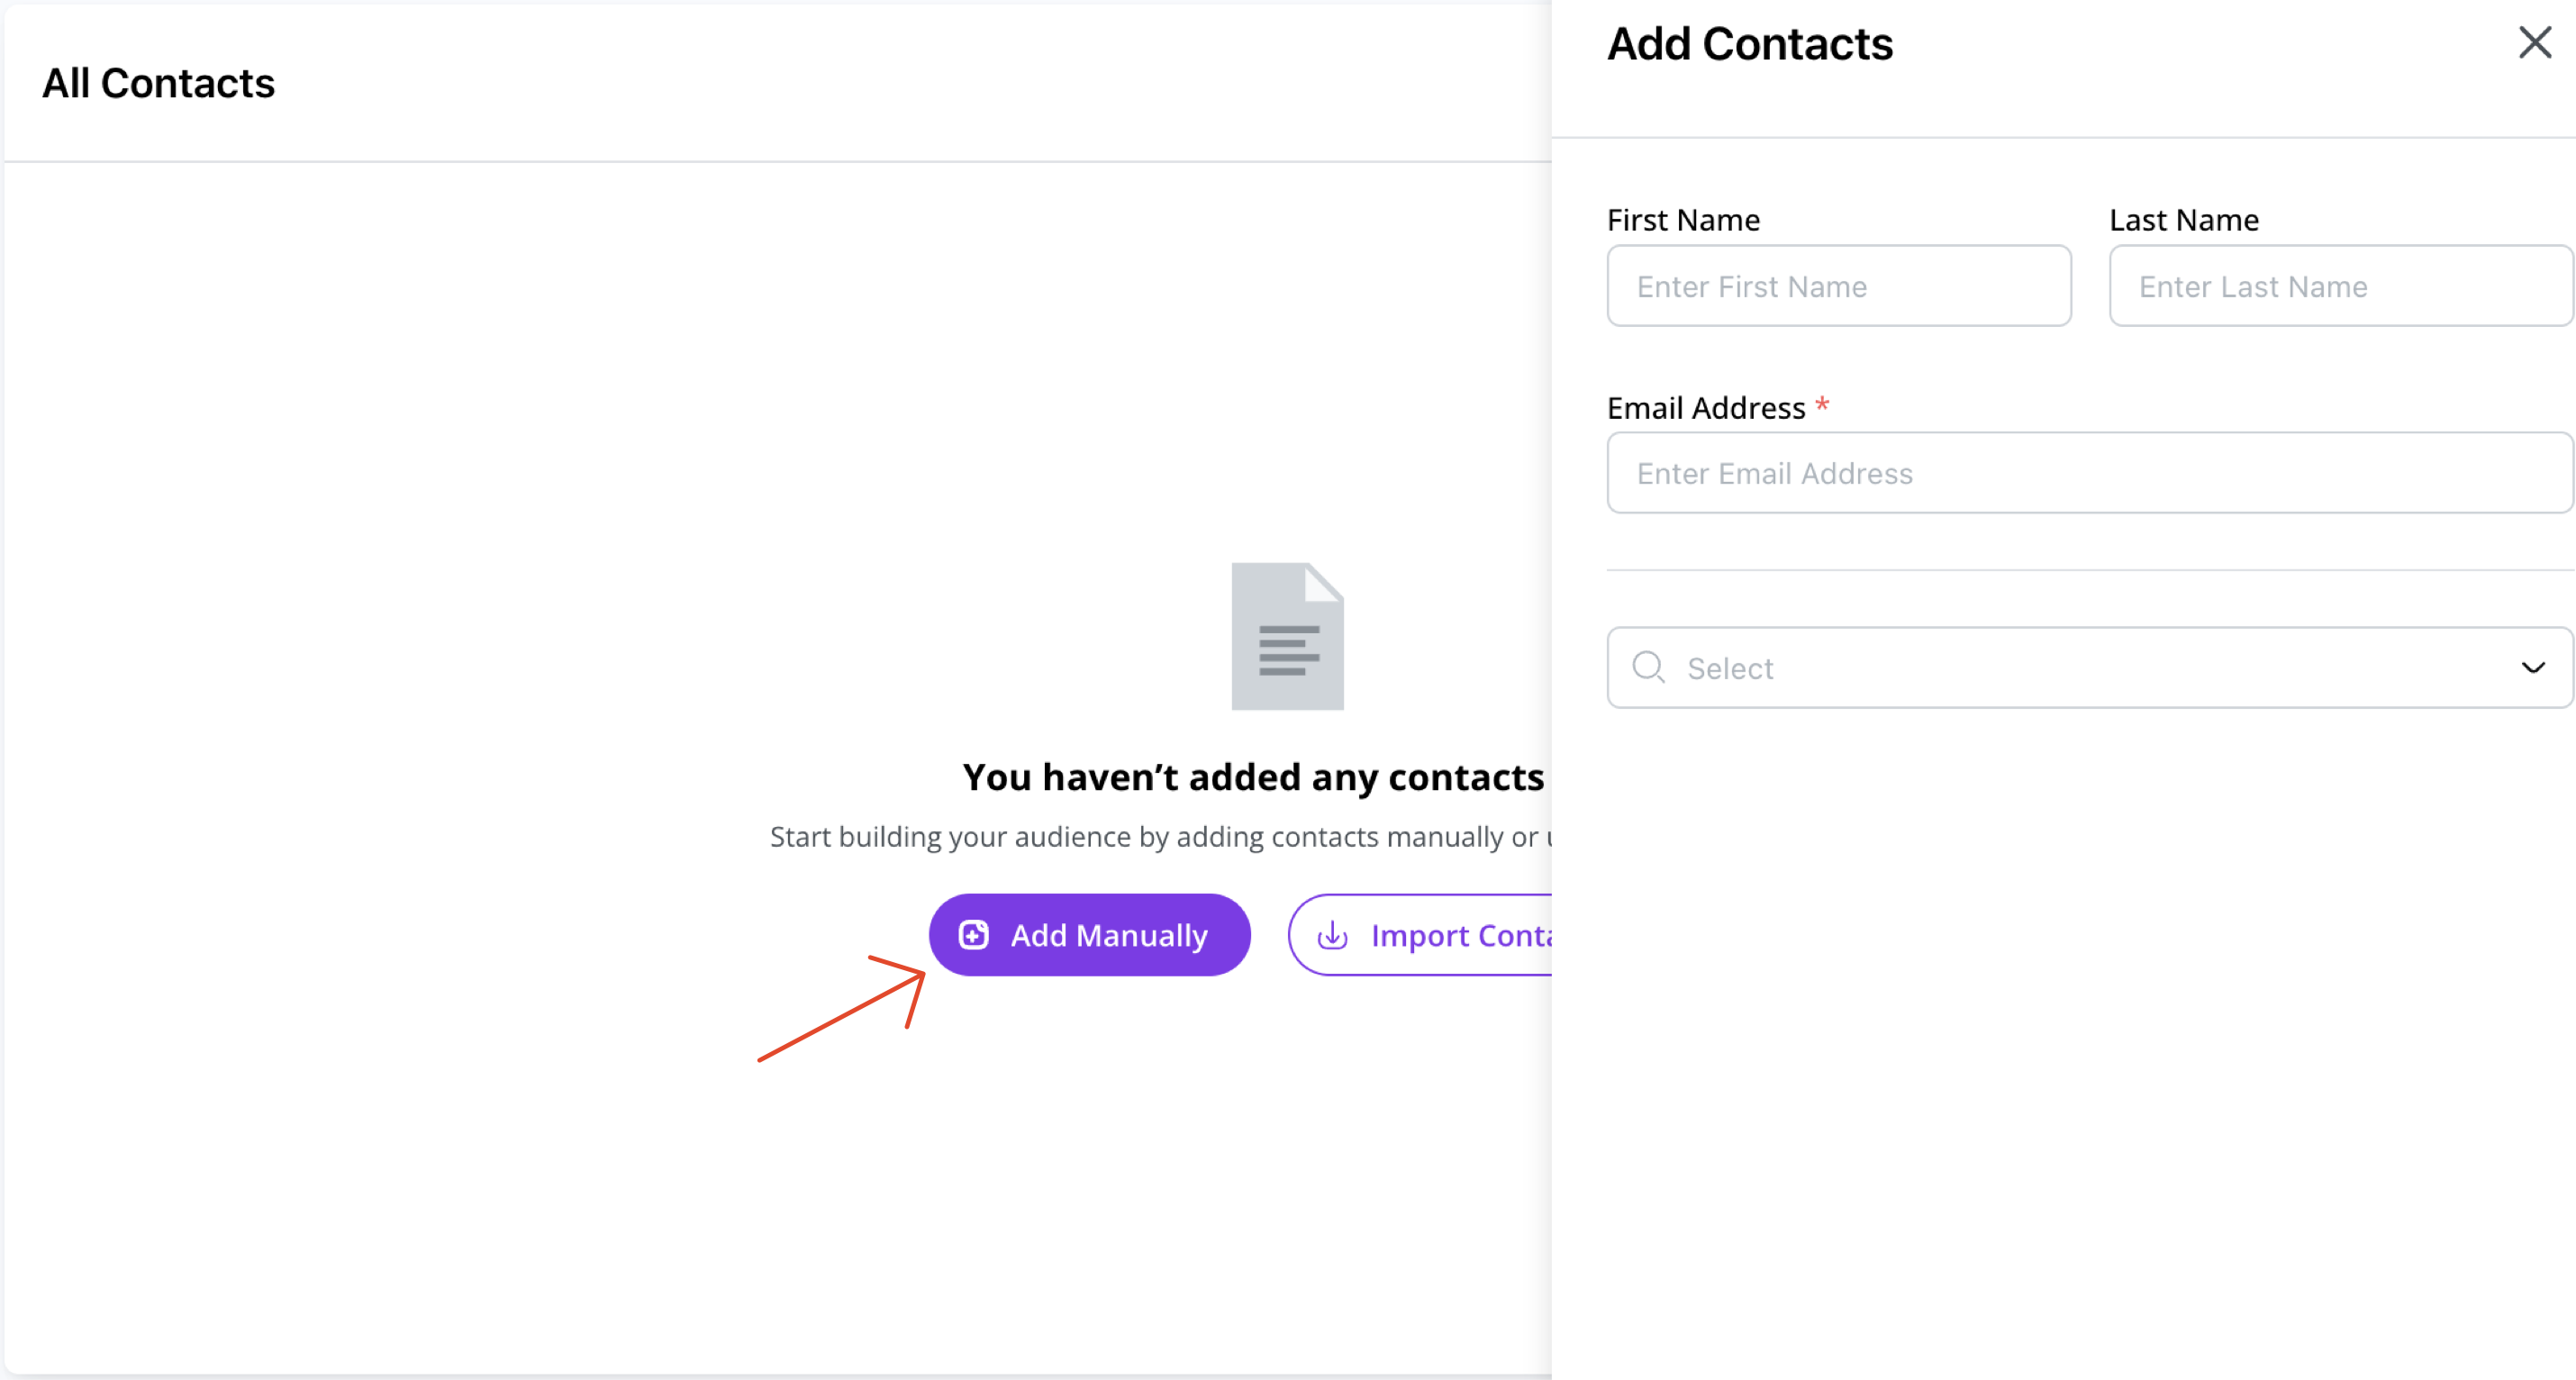
How to Add a Contact
- Go to the Audience section from your dashboard sidebar.
- Click on Add Manually.
- Fill in the mandatory Email Address field.
- Optionally, enter additional fields value for First Name and Last Name.
- Use the Select Field dropdown to add more predefined fields if needed.
Available predefined fields:
| Category | Field | Key |
|---|---|---|
| Basic Info | Full Name | fullName |
| Mobile Number | mobileNumber | |
| WhatsApp Number | ||
| Gender | gender | |
| Date of Birth | dob | |
| Location Details | City | city |
| State / Province | state | |
| Country | country | |
| Pincode / ZIP Code | pinCode | |
| Professional Info | Job Title | jobTitle |
| Company Name | company | |
| Department | department | |
| Team | team |
Using Custom Fields
You can also create your own fields if the predefined ones don't meet your needs.
- Click on + Create a new custom field at the bottom of the field selector.
- Enter a Custom Label (user-facing name).
- Enter a Key (internal identifier without spaces or special characters, e.g.,
favColor,membershipId).
What is a Key?
A key is a unique internal name used to store and retrieve custom data fields. Once created, the key cannot be changed.
Tip: Once a custom field is created, it becomes available for future selection whenever you add or import contacts.
Finalizing
- Click Save & Add Another if you want to keep adding more contacts.
- Or click Save & Close to finish adding contacts.